2FA: A Simple Step, a Huge Impact on Your Business Security
By Karyn Tan on September 17, 2024 in Product News, Did You Know, Power Tip Tuesday, PowerTips – Admins, PowerTips – Users
Contributed by Yasuko Komiyama, Zimbra Senior Sales Engineer
Co-edited by: Karyn Tan, Senior Manager in Marketing
Imagine a world where every piece of your business’s sensitive data was as public as a viral social media video. A world where hackers could easily access and exploit information meant to be confidential. That is the reality without the right security measures.
Businesses, especially smaller ones, may prioritize other aspects of their operations, such as growth and profitability, over investing in robust security measures. This negligence can create significant vulnerabilities.
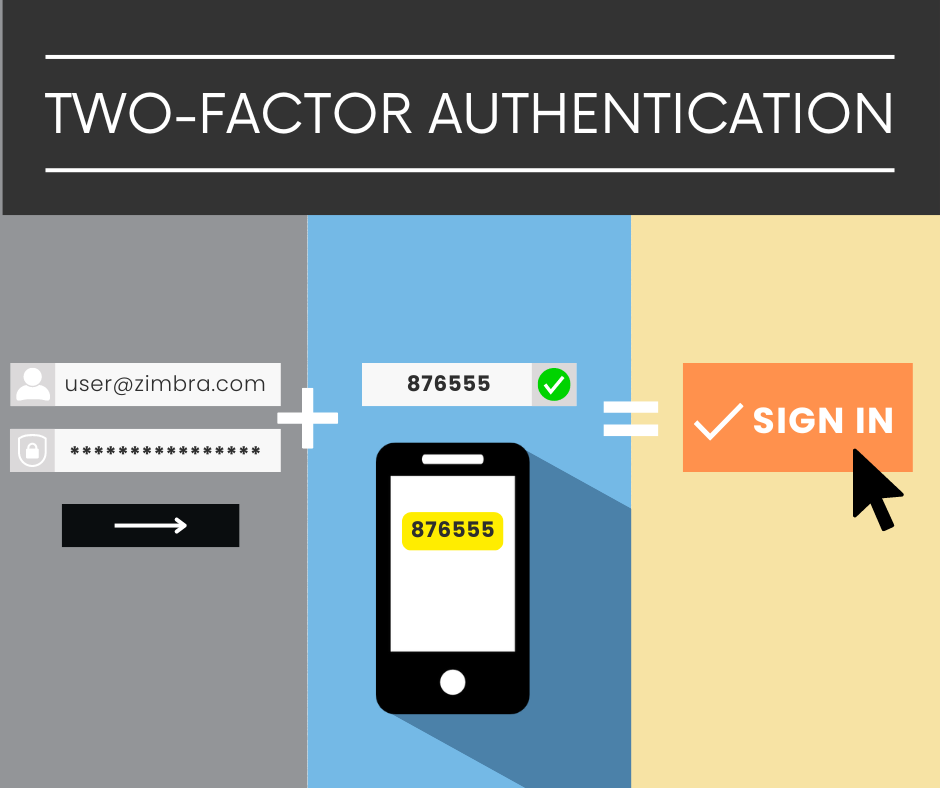
An image showing how 2FA works
2FA is like a digital fortress that shields your customers’ information. It is a small investment in technology, but a big step towards building trust and loyalty.
In the context of security, Two-Factor Authentication, or 2FA is a key feature.
Did You Know
You can use email as an additional factor in 2FA
Starting with the Daffodil version of Zimbra (version 10.1) users can use their recovery email address and the authentication app as an additional factor in the multifactor authentication process. Admins still have full control and can enforce both two-factor authentication methods, letting users switch between email or an authentication app as an authentication factor.
In general, there is a trend of growing distrust of third-party authentication apps, such as the ones created and managed by Microsoft and Google. Some organizations want to reduce their dependency on third-party apps. That is where this feature comes in handy as a replacement for the authenticator app-based method.
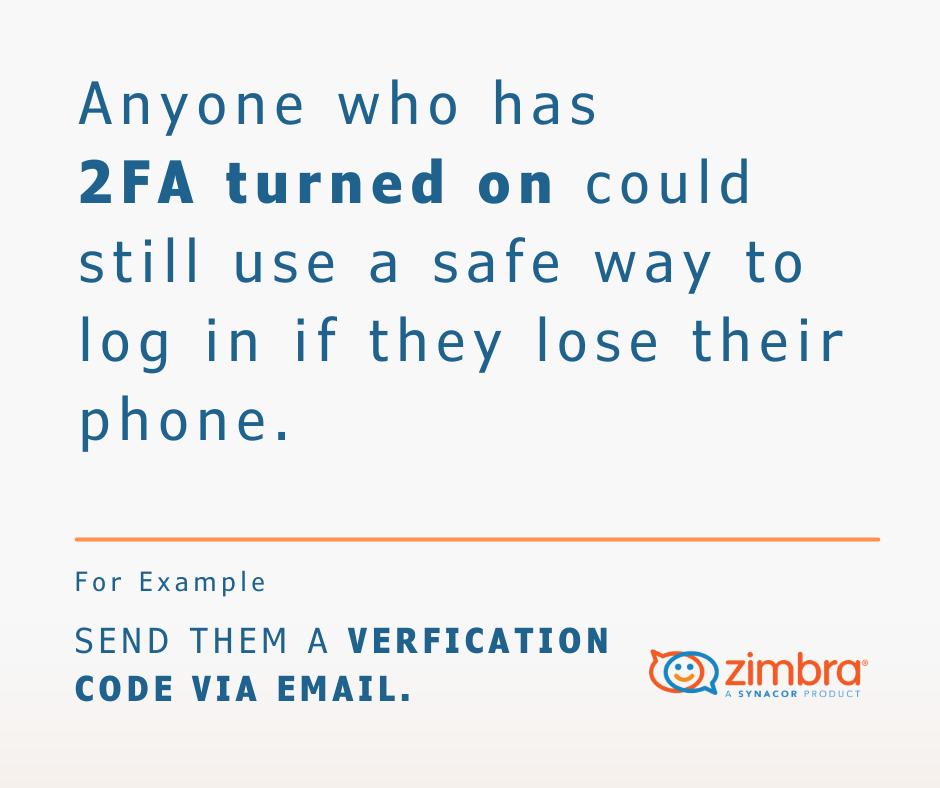
Text explaining how some can still use a safe way to log into their accounts even when they lose their phone
When an end user loses their smartphone and 2FA has been enabled, you could still have an alternative secure method to login using a verification code sent via email (you can re-set the configuration of the Authenticator later).
In this blog, we are sharing ways that you can set up 2FA from these two perspectives
End User
- 2FA with email
- 2FA with an authenticator app
- Change preferred 2FA method
- Remove 2FA method
Administrator
- Enable 2FA on the default class of service
For end users
Employees can easily activate 2FA through their email settings.
To enable 2FA with email, you will need
- access to your Zimbra account and
- a second email address:
STEPS TO ENABLE 2FA WITH EMAIL
Step 1. In Zimbra, click the gear menu.
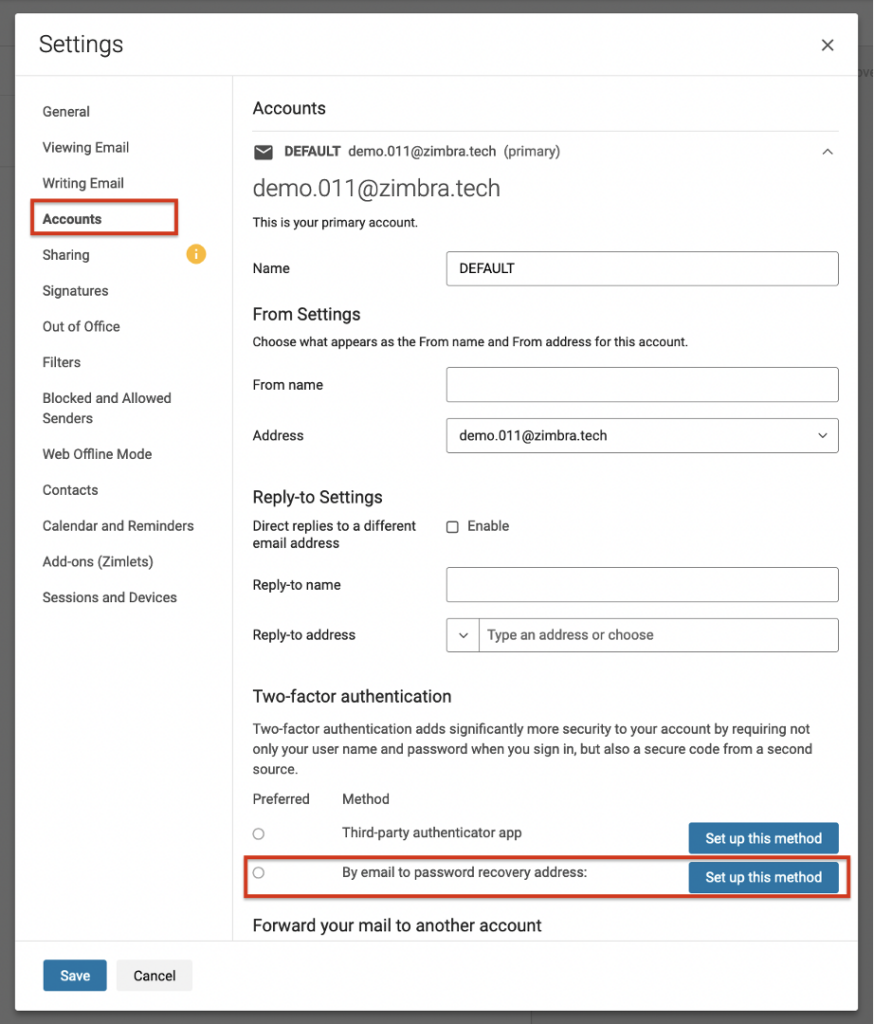
Step 2. Choose Settings > Accounts.
Step 3. Select your account and click the “Set up this method” button next to “By email to password recovery address”.
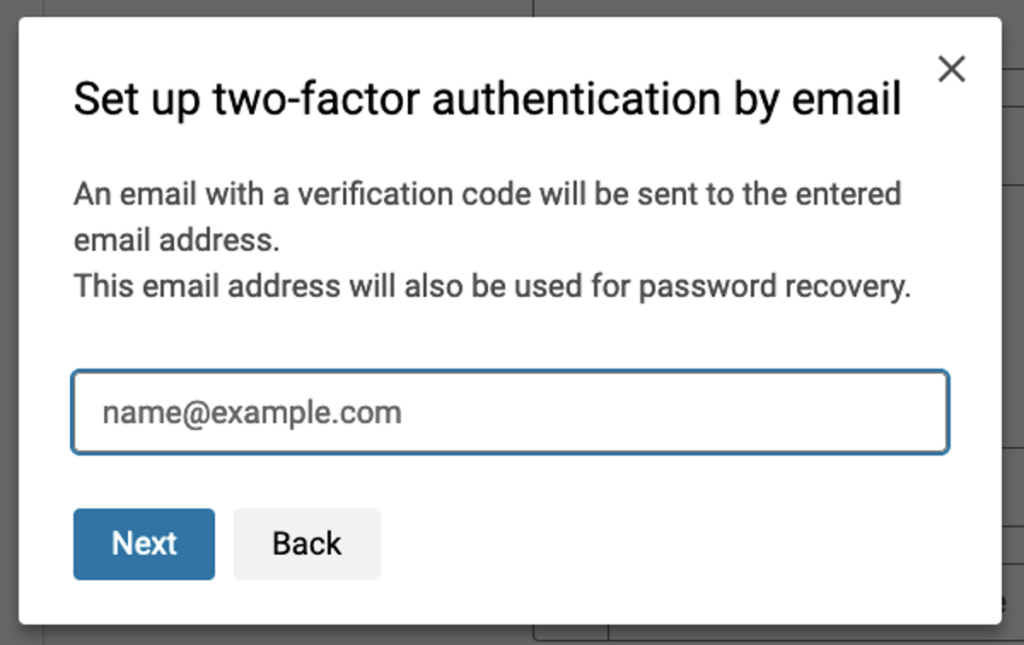
Step 4. Enter your other email address to which a verification code will be sent.
A screenshot of 2FA setup by email
Step 5. Enter your Zimbra password.
Step 6. You will receive a verification code.
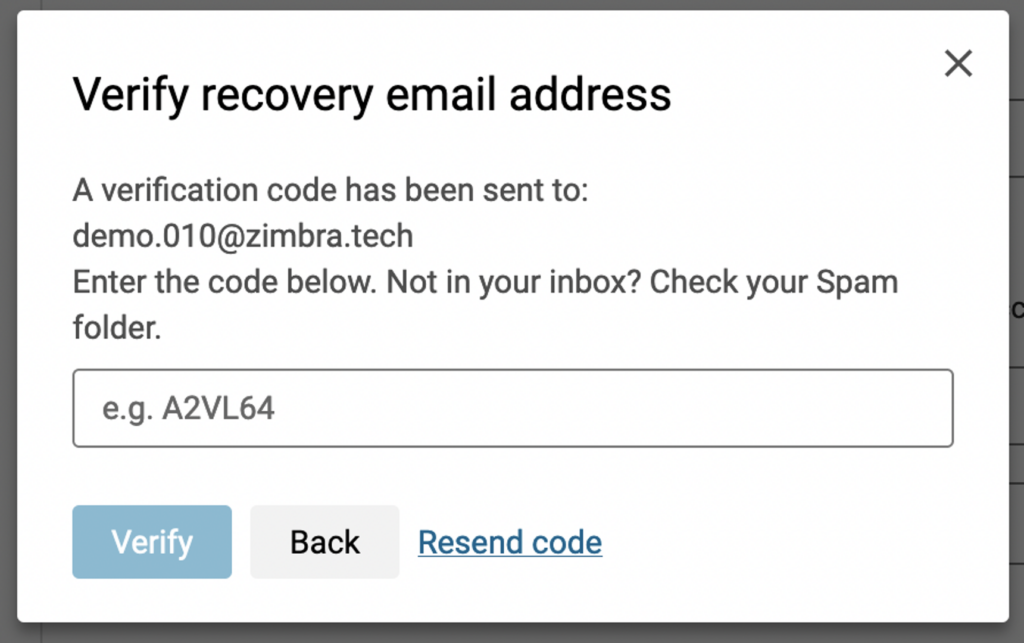
Step 7. Enter the verification code. Click Verify to complete 2FA setup.
Screenshot shows how to verify recover email address
If you do not receive the verification code, click “Resend code”.
Step 8. Success. You enabled 2FA via email for your Zimbra account!
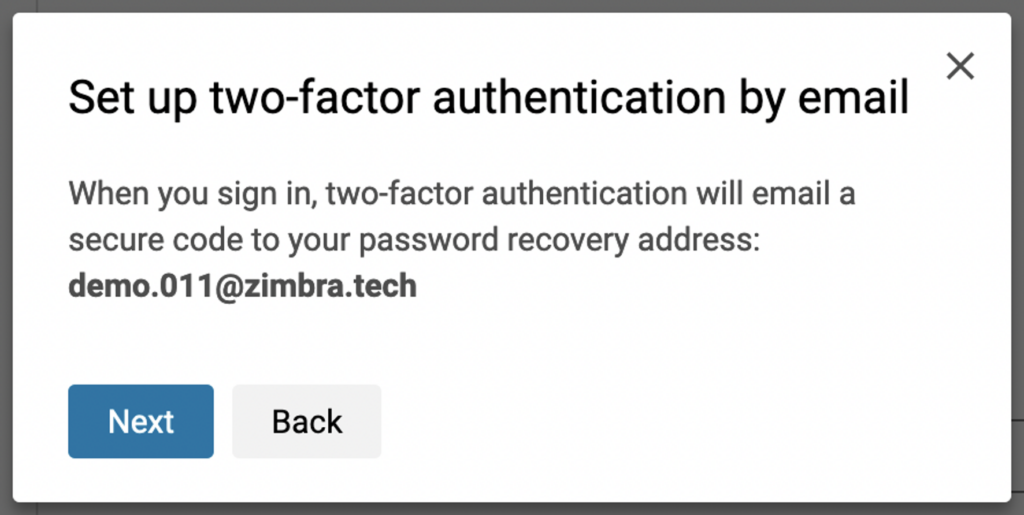
Note: If you have already set a recovery email address, you will see the following dialogue window at Step 4 instead of the usual prompt for the second email address.
This window appears if you have already set a recovery email address.
STEPS TO ENABLE 2FA WITH AUTHENTICATOR APPS
You can also setup 2FA with Authenticator apps
Step 1. In Zimbra, click the gear menu.
Step 2. Choose Settings > Accounts.
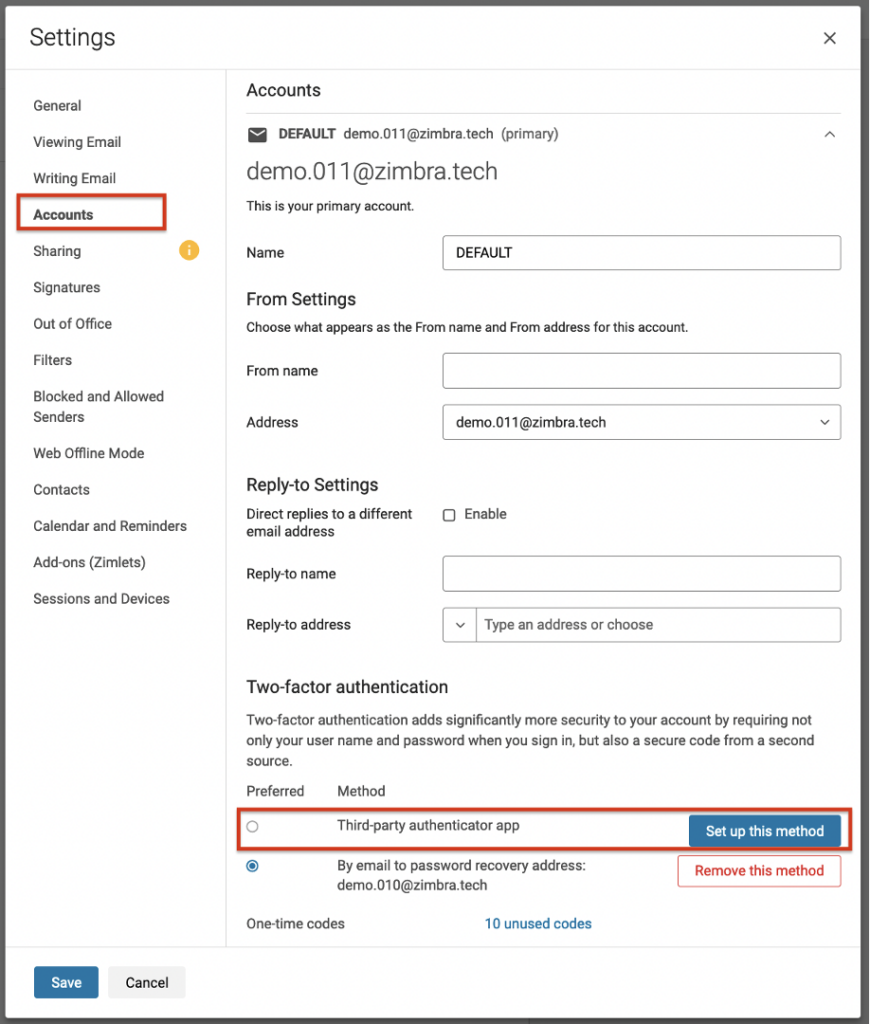
Step 3. Select your account and click the “Set up this method” button next to “Third-party authentication app”.
Screenshot of user interface to setup 2FA with authenticator apps
Step 4. Enter your Zimbra password.
The next steps require your smartphone.
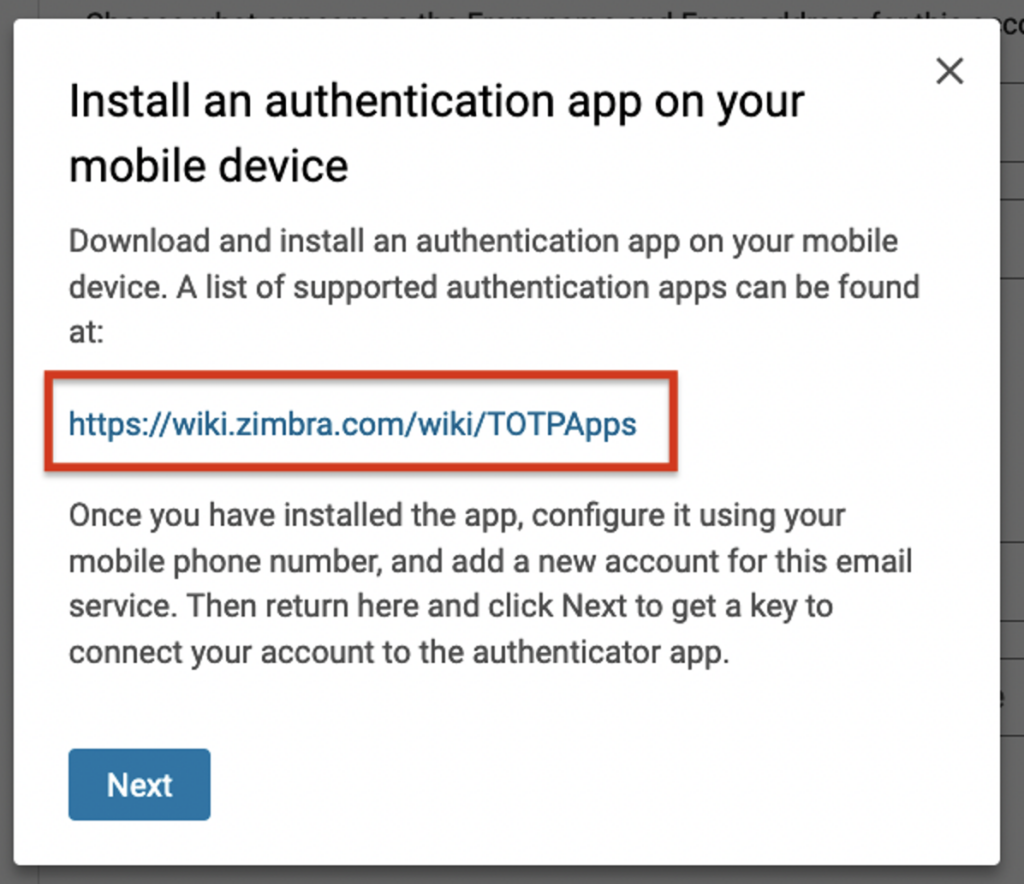
Step 5. Click the URL to see the authentication applications available for your smartphone. Download the authentication application and install it on your smartphone. Click next.
User interface shows where to find the app and install
Step 6. Scan the code on the screen using the authentication app on your smart phone or type in the key. Click Next.
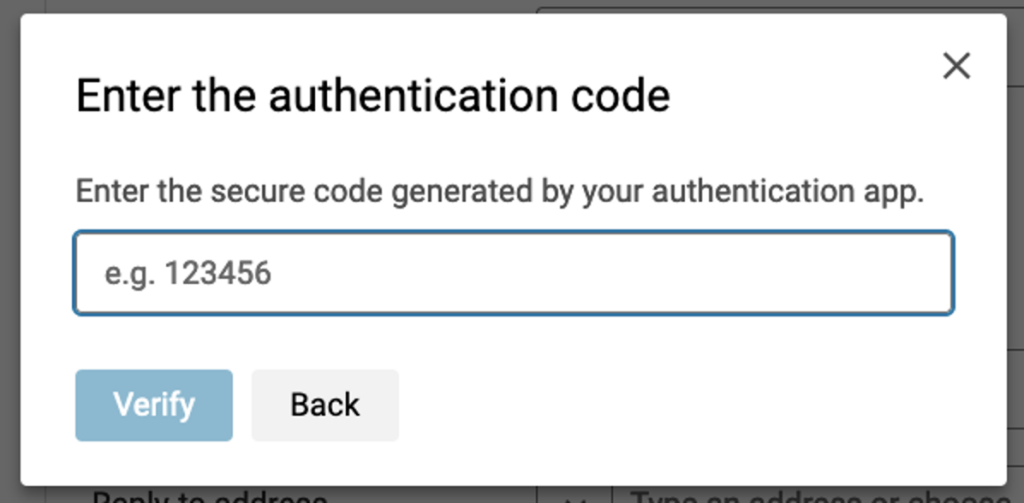
Step 7. Enter the code provided on your smartphone. Click Verify to complete 2FA setup.
Screen shows authentication code field
Step 8. Success. You enabled 2FA with Authenticator app for your Zimbra account!
A new code for the method you want to use.
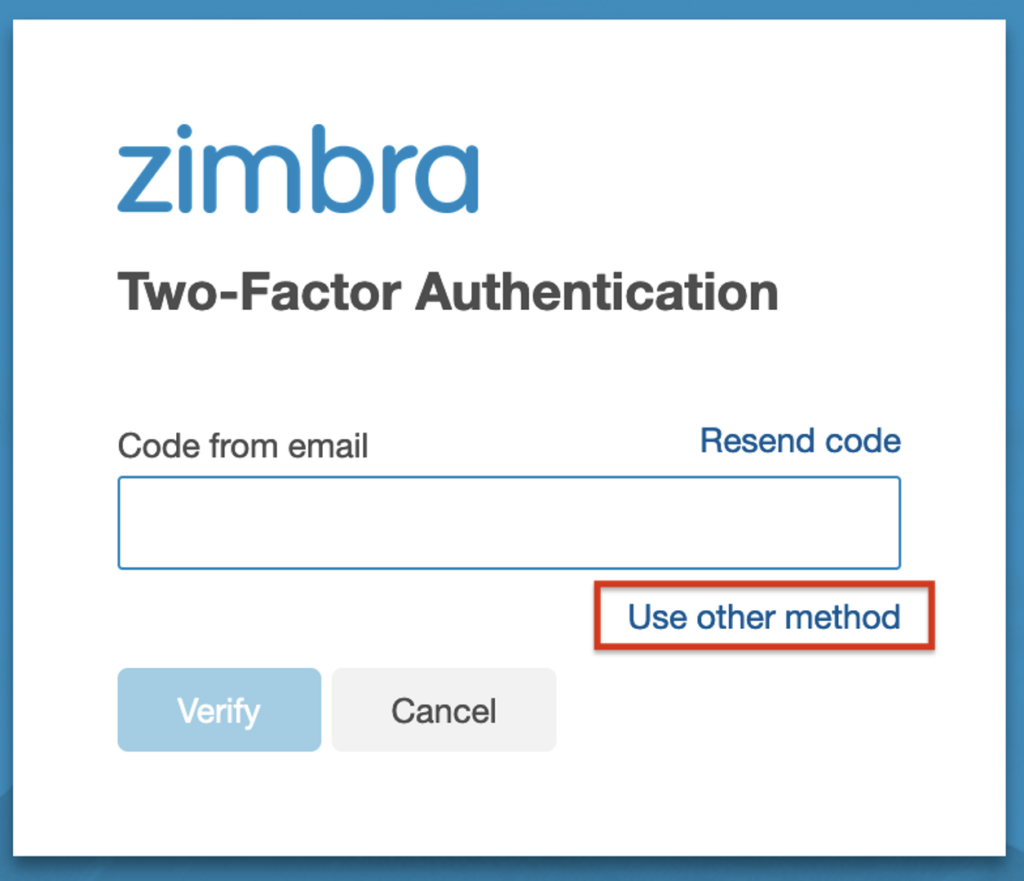
When you configure multiple methods, you will be prompted for a new code of the preferred method on your login time, Authenticator app or email.
Step 1. Click “Use other method” to change the method.
Choose “Use Other Method”
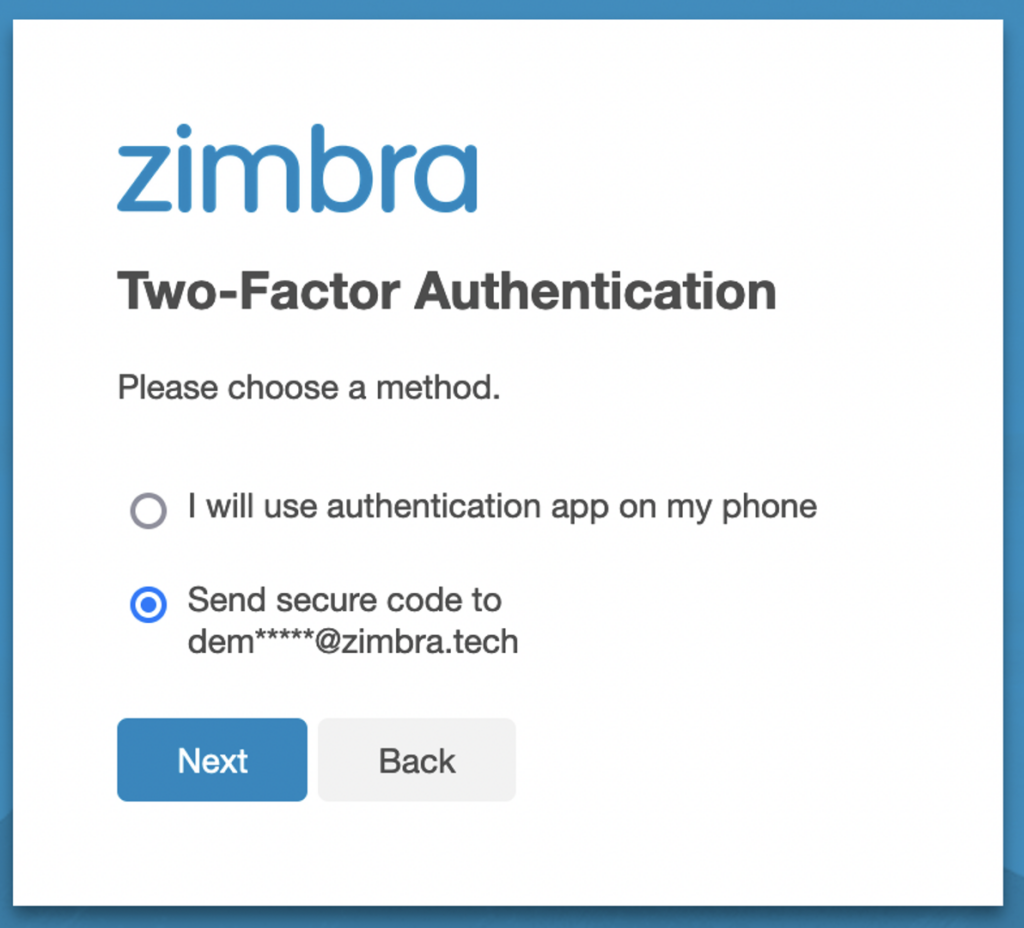
Step 2. Choose a method.
Showing a screen for “Choose a method”
To change the preferred method
Step 1. In Zimbra, click the gear menu.
Step 2. Choose Settings > Accounts.
Step 3. Select your account.
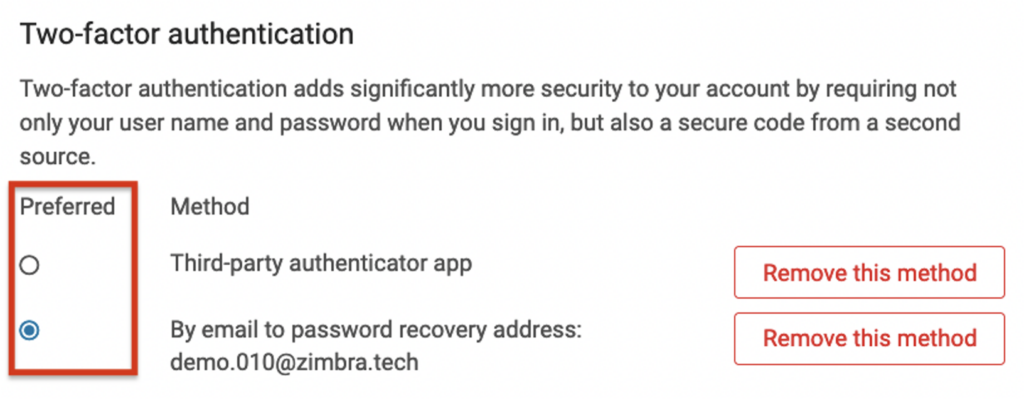
Step 4. Select the authentication option radio button, under “Preferred” and save it.
User interface showing change the preferred method
To remove the method
- In Zimbra, click the gear menu.
- Choose Settings > Accounts.
- Select your account.
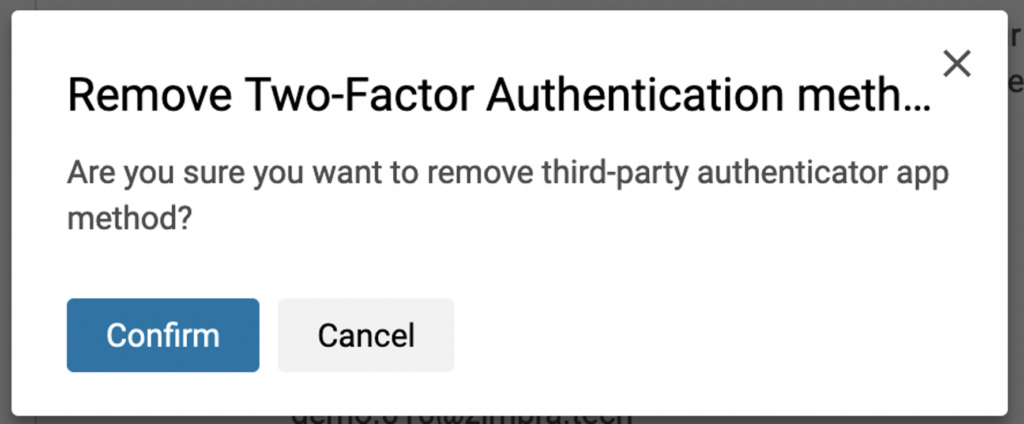
- Click “Remove this method” and confirm.
Screen showing Remove 2FA method
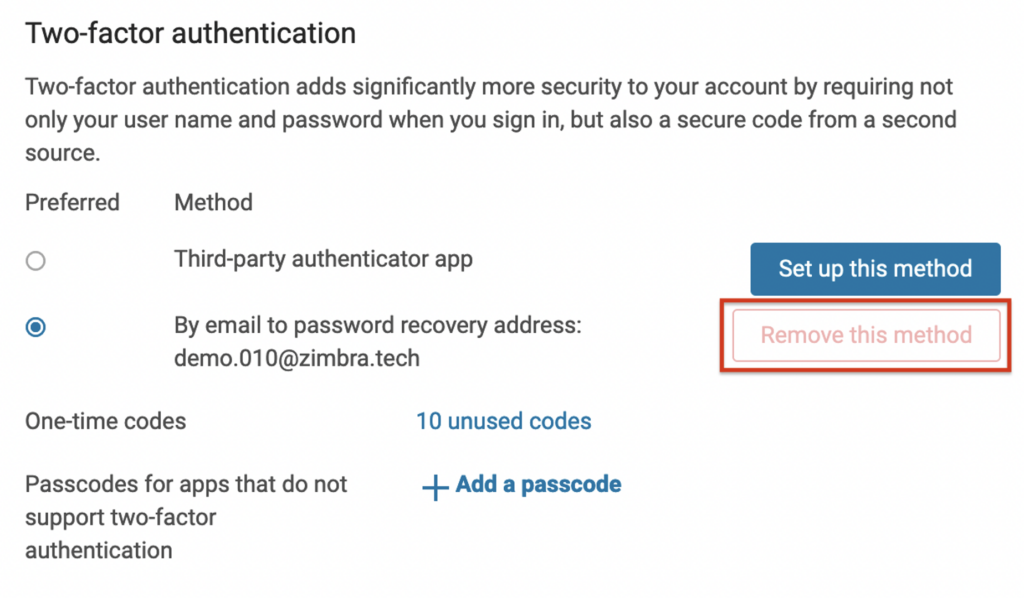
Note: When 2FA is enforced under settings (set zimbraFeatureTwoFactorAuthRequired to TRUE), you can remove one of two methods but cannot remove both (The “Remove this method” button will be grayed out).
Screen shows when 2FA is enforced
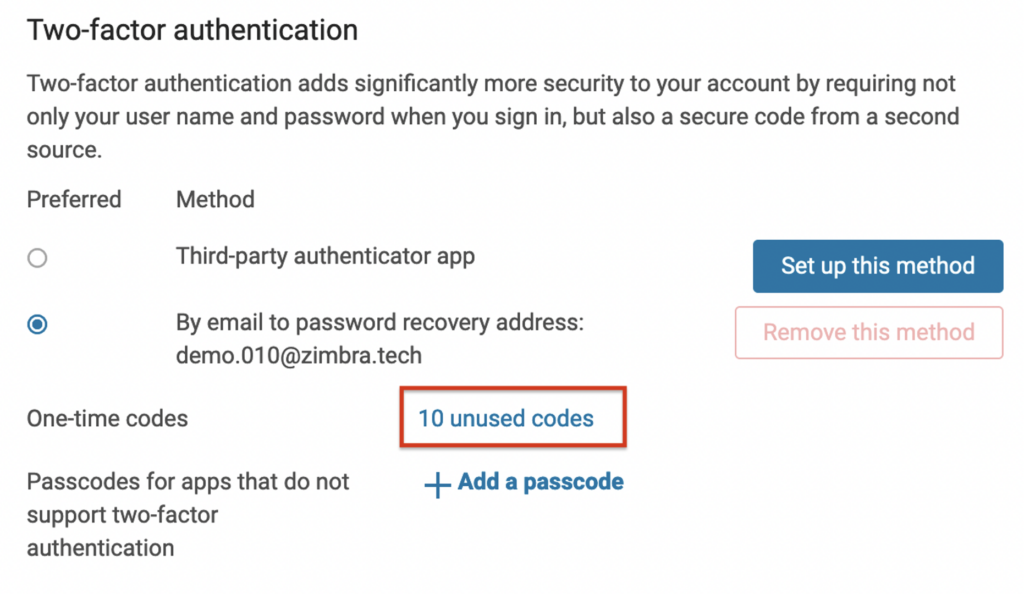
Note: You can use one-time codes if you do not have your phone, or your other email address is not reachable. Click the “10 unused codes” link and print the 10 codes.
Showing screen on where to find ten unused codes
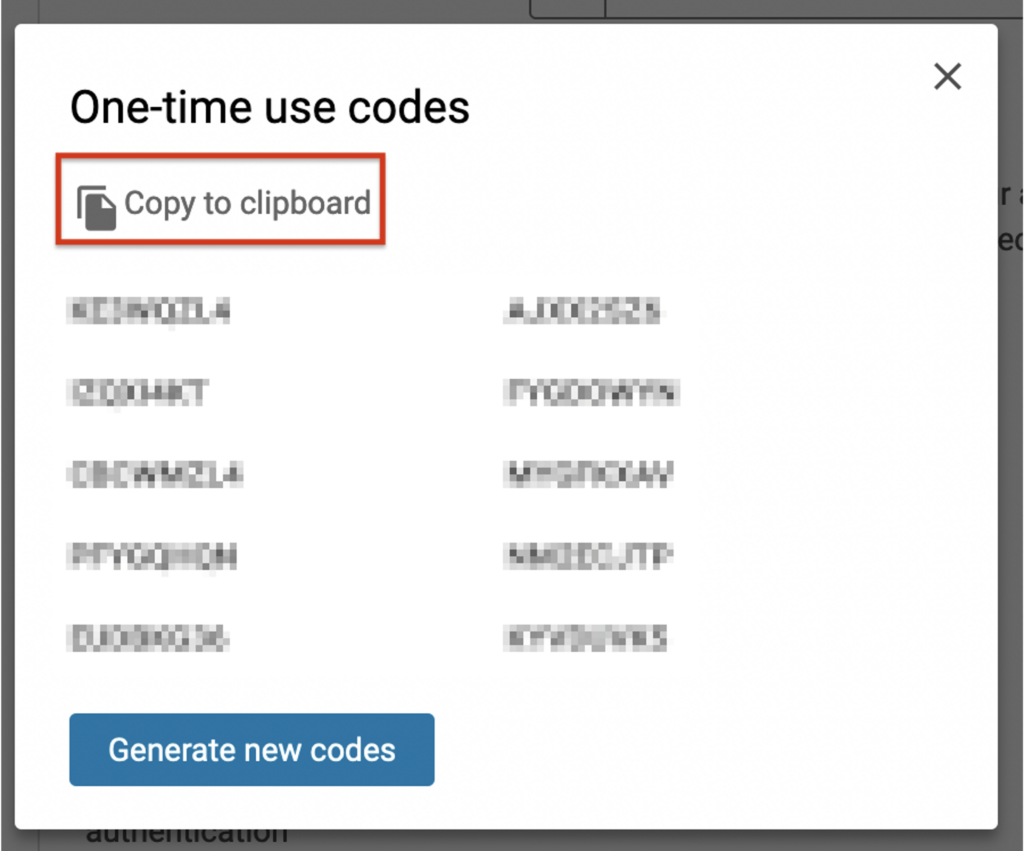
Keep the codes handy, so they are available when you need them.
Screen showing one-time unused codes
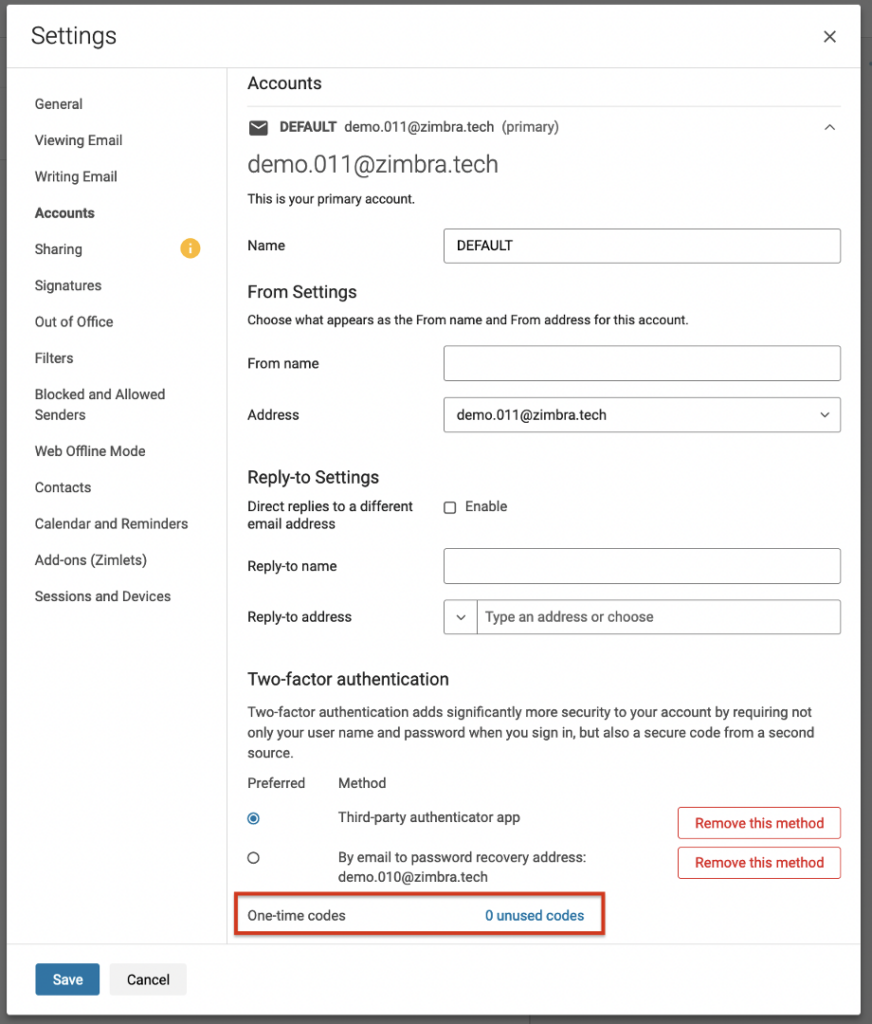
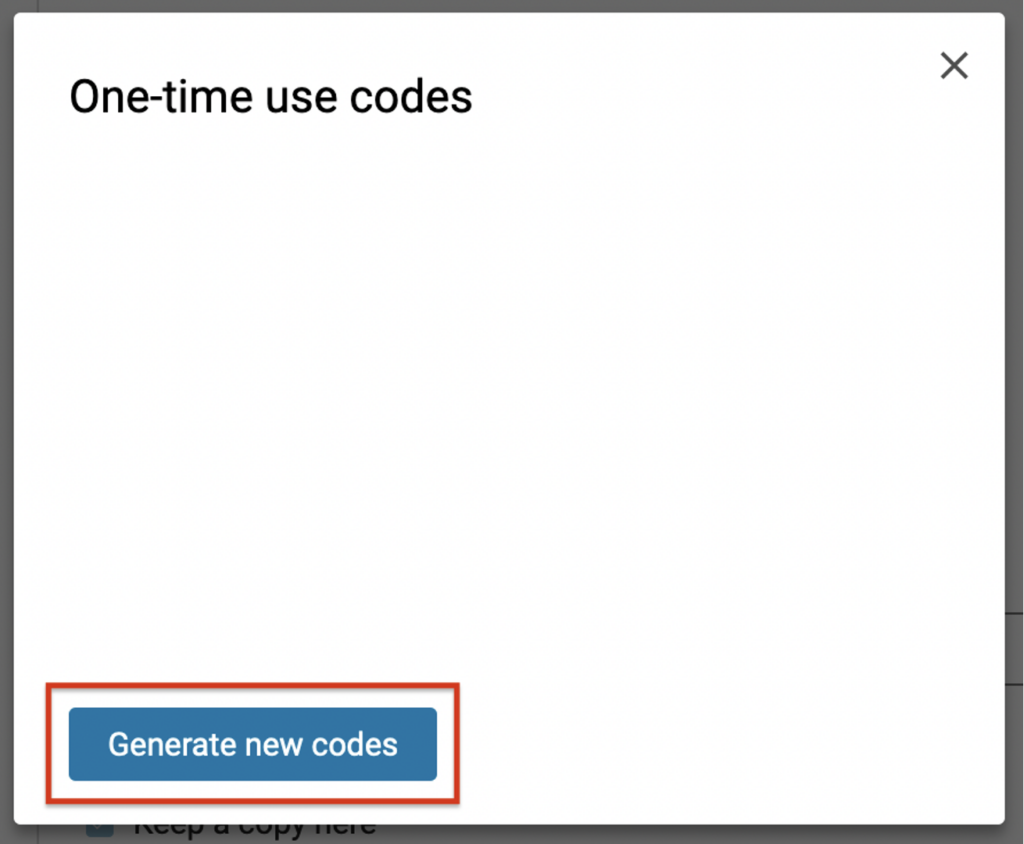
The number of “unused codes” is counted down each time you use one. When you run out the unused code, click “Generate new codes” to generate another 10.
The screen shows unused code is at zero
Screen shows how to generate new codes
Note: If you do not see the “Two-factor authentication” section in your Settings, your organization has not enabled the 2FA feature. Please contact your System Administrator or email service provider for more information.
For administrators
To enable the Two-Factor authentication on the default class of service, you can run it from the command line as user Zimbra:
zmprov mc default zimbraFeatureTwoFactorAuthAvailable TRUE
To allow a single method
zmprov mc default zimbraTwoFactorAuthMethodAllowed app
zmprov mc default zimbraTwoFactorAuthMethodAllowed email
To allow both methods
zmprov mc default +zimbraTwoFactorAuthMethodAllowed app\
+zimbraTwoFactorAuthMethodAllowed email
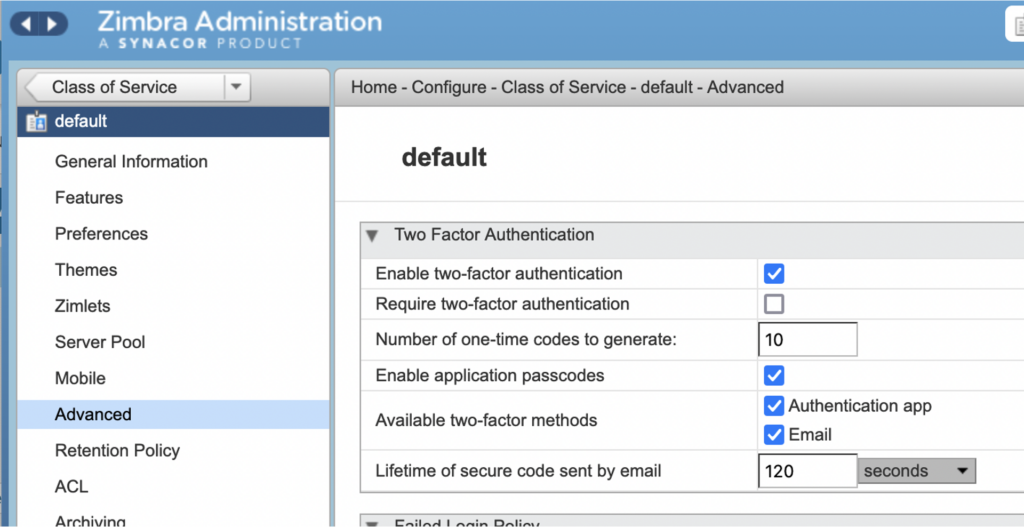
You can also enable two-factor authentication via the admin console Web–UI, go to Configure -> Class of Service -> default -> Advanced and check Enable two-factor authentication. Check Authenticator app and/or Email in Available two-factor methods. Do not forget to click save.
Screen shows Zimbra Administrator’s view
Repeat these steps for all Classes of Service where you want to enable 2FA.
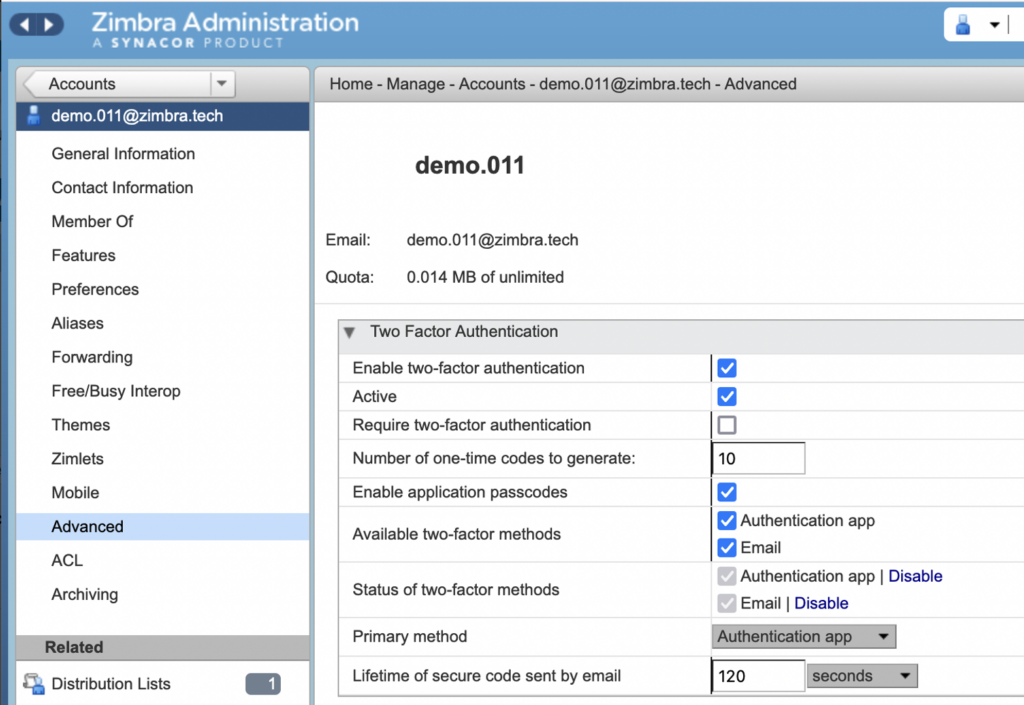
Admin can manage the current 2FA related configurations for each user. Go to Manage -> Accounts -> [user] -> Advanced and verify the value in Two Factor Authentication section.
Click “Disable” link to reset the current configuration of “Authenticator app” or “Email” method on behalf of the end user.
Screen showing Zimbra Administrator’s view
Note: When your administrator has reset both methods, please make sure to set zimbraFeatureTwoFactorAuthRequired attribute to FALSE.
Add 2FA to Your Onboarding Checklist
By making 2FA part of the onboarding process, you can guarantee that every new employee has the knowledge and skills to protect their company’s data from unauthorized access.
You are not only protecting your customers’ data but also safeguarding your reputation and mitigating the risk of costly data breaches.
Don’t wait for a crisis to strike. Take proactive steps to protect your business and your customers by adopting 2FA as a standard security practice.
